Using the same hardware token for Google and Office 365
In this article, we will show a workaround that allows using the same hardware token for a user to access both Gmail (and other Google services) and MS365 (aka Office 365) services.
Token2 programmable tokens are "drop-in" replacements of mobile applications such as Google Authenticator or Token2 TOTP+. If you would like to enable hardware token two-factor authentication for your Google Account, you can use the programmable tokens as an alternative to the mobile application method by following the instructions below. The prerequisite is an NFC-enabled device (currently supported platforms are: Android, iPhone 8 or newer or Windows with NFC writer).
Prerequisites
The following will be needed:
- A Token2 programmable hardware token (any model would work)
- An NFC Device and a burner application for burning the seed. We currently have Windows and Android applications available for all tokens and iPhone app for the latest generation models (and iOS13+ for the most recent models, with part numbers ending with "-i", for example, C301-i )
- A Google account with a phone number or a FIDO key enrolled as a second factor (Google currently does not allow TOTP to serve as a primary MFA factor)
- Global tenant admin access to Azure AD (Microsoft Entra ID)
- Azure AD (Microsoft Entra ID) Premium (P1 or P2) licenses for each user being enrolled
A. Google account TOTP provisioning
Find the 2-Step Verification settings for your account
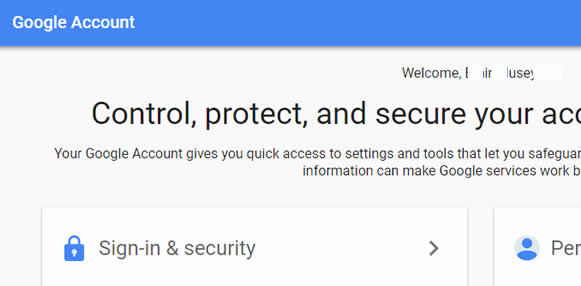
Log in to your Gmail account, go to My Account.

Choose “Sign-in & Security” tab.
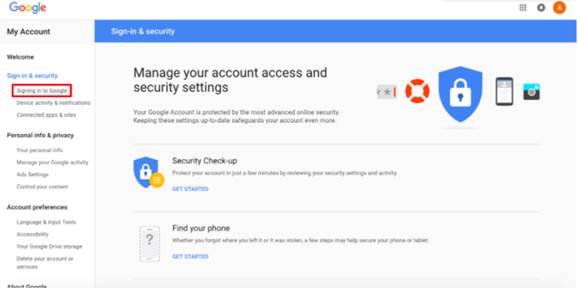
Click “Signing in to Google”.
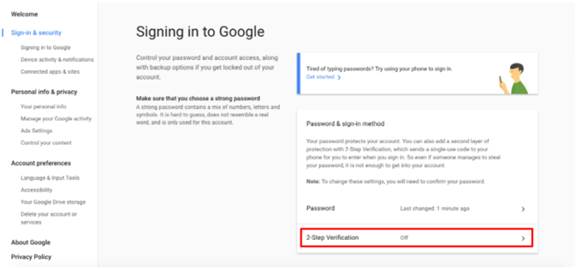
Select “2-Step Verification”.
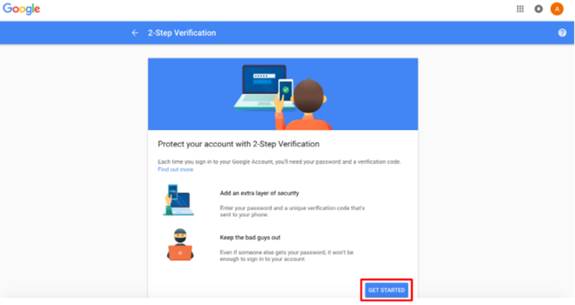
Get started!
Enter your phone number and select a method to get codes > click “Next”.
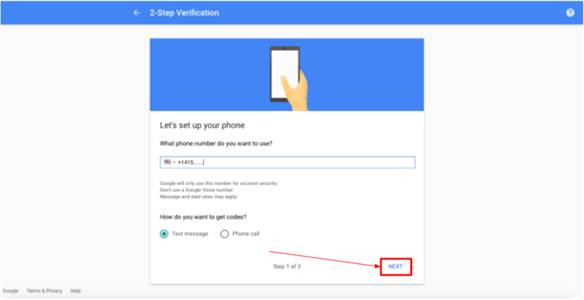
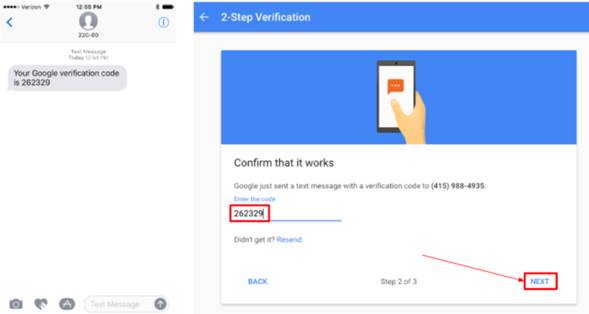
You receive an SMS on your phone with a code. This is a requirement of Google, the phone number will be used to restore access in case access to the authenticator app (or in our case the hardware token) is lost or the profile is corrupted.
Enter the verification code to confirm that it worked – click “Next”.
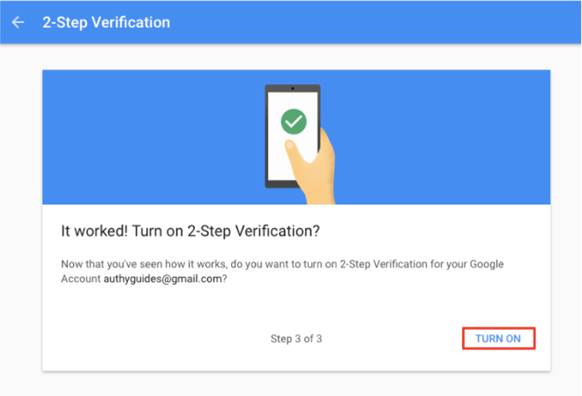
Now, turn on 2-Step verification.
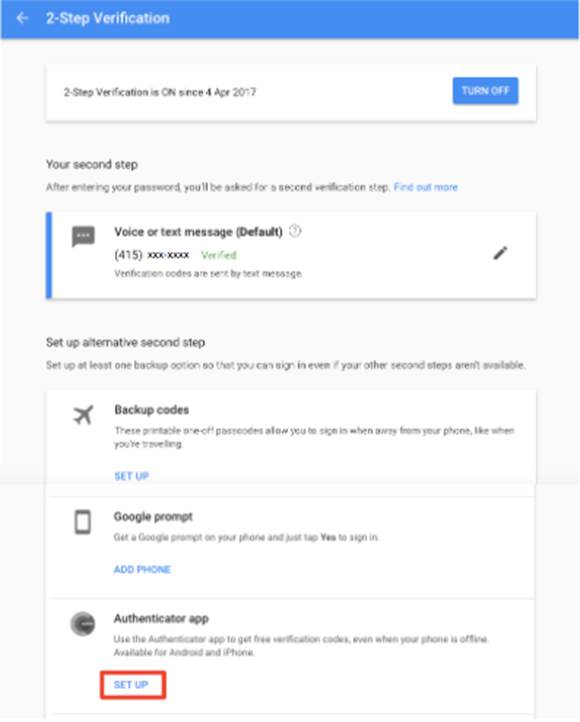
Generate and display the QR Code
For the best user experience, Google recommends to set up the Authenticator App. We will have to select this option as our burner app is using the same QR code shown for Google Authenticator to set the seed of the hardware token.
Select iPhone as your kind of phone and click “Next” (selecting Android phone may change the process of enrolling, especially if you are using the same Google account on your Android devices)
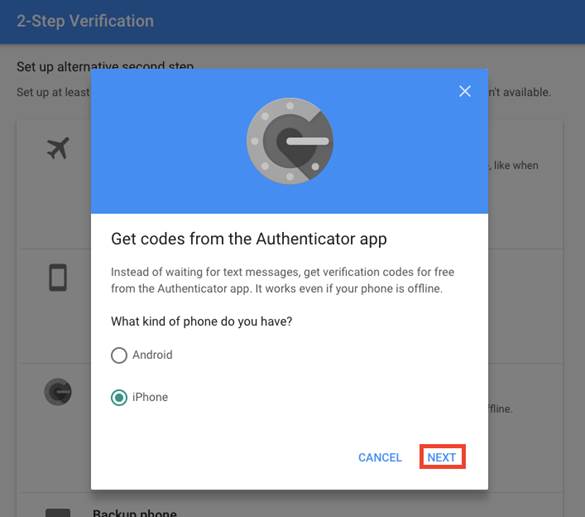
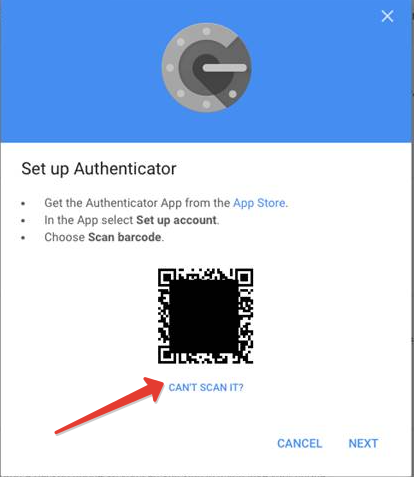
On the next step, the QR code should appear on the screen.
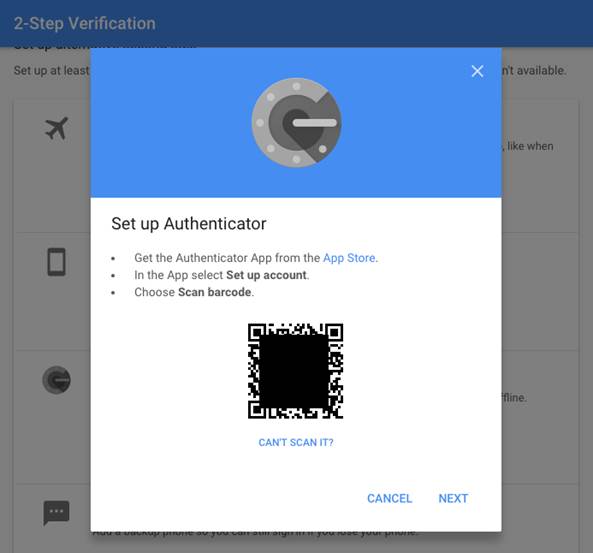
The steps below are showing Android app as an example, the procedure with iPhone or Windows are similar
- Launch the NFC burner app on your Android device and hit the "QR" button
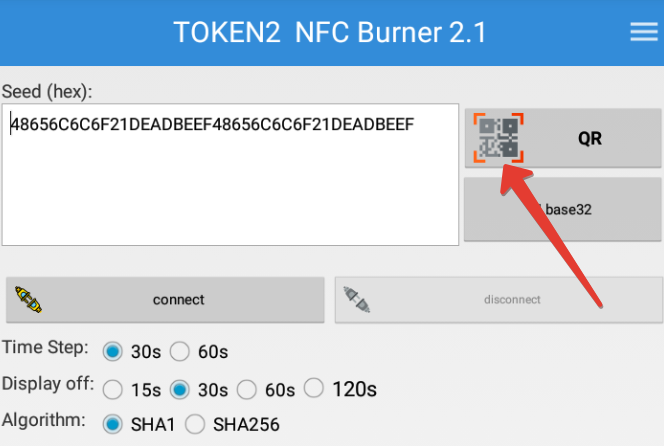
- Point the camera to the QR code shown on the account page. Upon a successful QR scan, the camera window should disappear
- Turn on the token and touch it with your phone (make sure it is overlapped by the NFC antenna) and click "Connect" on the app
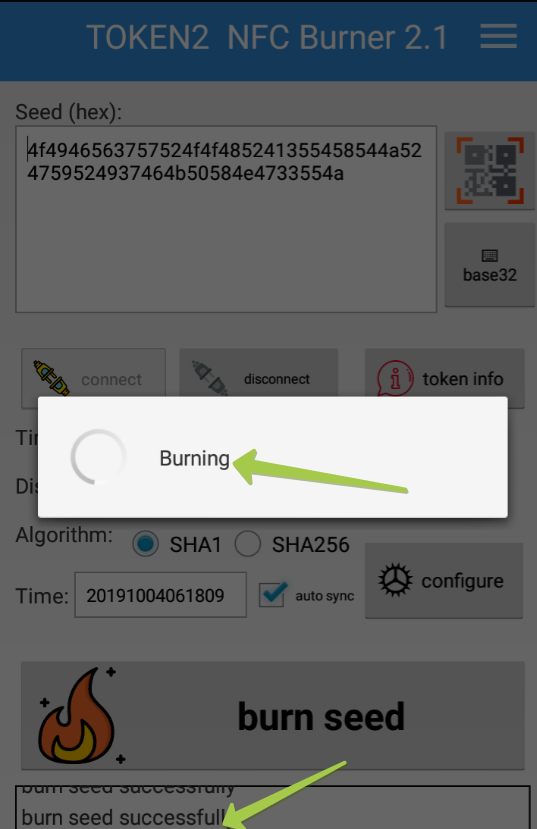
- Upon successful connection, click the "Burn seed" button. If NFC link is established and the code is correctly scanned, you should see a status window showing "Burning..." and eventually (in a second or two), "burn seed successful.." message in the log window
- Before continuing with the next step, on the Google Account interface, click on "Can't scan it?" link and copy the seed's text representation to a text file and have it ready for the next phase.
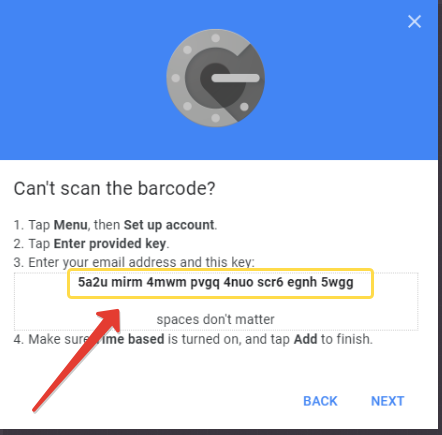
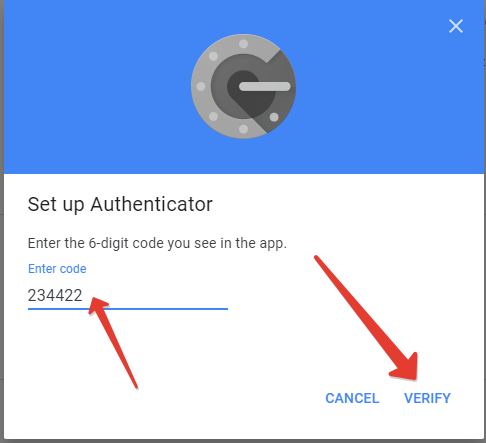
- At the next step, enter the code generated by your hardware token, and click on Verify
B. Azure MFA Provisioning
Prepare a CSV file in the following format using the base32 seed recorded in the previous step. The format will be as follows:
upn,serial number,secret key,time interval,manufacturer,model<[email protected]>,10000001 , <SEED>,30,Token2,C301
Replace the following values:
<[email protected]> replace with the UPN (email address) of the user being provisioned
<SEED> replace with the base32 seed recorded on the previous phase
Save the file with CSV extension. Important: make sure you use a plain text file editor, such as Notepad or Notepad++. Editing this file with Excel may break the format. Import the CSV file to Azure MFA as described in the guide.
After completing the activation with Azure AD (Microsoft Entra ID), the same hardware token can be used for both systems.
Subscribe to our mailing list
Want to keep up-to-date with the latest Token2 news, projects and events? Join our mailing list!
